If you live in a climate where temperatures dip below freezing, your swimming pool quietly faces one of the most stressful seasons of the year.
According to pool service data across cold-weather regions, a large percentage of spring repair calls trace back to mistakes made during pool closing, not wear and tear from swimming season.
Cracked pipes, warped fittings, stained surfaces, and algae explosions usually start months earlier, right when pools are shut down for winter.
Winterizing a pool is not about rushing through a checklist. It is about understanding what water does when it freezes, how chemistry behaves when circulation stops, and which small oversights turn into expensive spring surprises.
This guide walks through pool closing in a practical, step-by-step way, focusing on prevention, not cleanup.
1. Choosing the Right Time to Close Your Pool
Timing matters more than many pool owners realize. Closing too early invites algae growth in warm water. Closing too late increases freeze risk before plumbing is protected. The sweet spot usually arrives when water temperatures drop consistently below 60°F.
Cooler water slows algae metabolism and stabilizes chlorine. That gives winter chemicals a fighting chance to last. At the same time, waiting for cooler nights reduces the risk of sudden cold snaps catching an unprotected system.
In regions with unpredictable fall weather, many owners rely on professional schedules.
For example, services like Dolphin Pool service often monitor temperature trends and local freeze patterns rather than calendar dates, helping prevent rushed or premature closures.
Proper timing sets the foundation for everything that follows, and it is one decision that should never be guessed.
2. Thorough Pool Cleaning Before Winterization
Before water stops moving, everything inside the pool should be clean. Debris left behind during closing breaks down over winter, staining surfaces and consuming chlorine. Leaves, insects, and organic debris become algae food once sanitation weakens.
Cleaning should include:
- Brushing walls and floor to remove biofilm
- Vacuuming settled debris
- Skimming the surface thoroughly
- Emptying baskets and traps
This step is about reducing organic load, not aesthetics. Even pools that look clear often have microscopic buildup that becomes problematic when circulation stops.
Taking extra time here reduces chemical demand later and prevents stubborn spring stains that are difficult to remove without aggressive treatments.
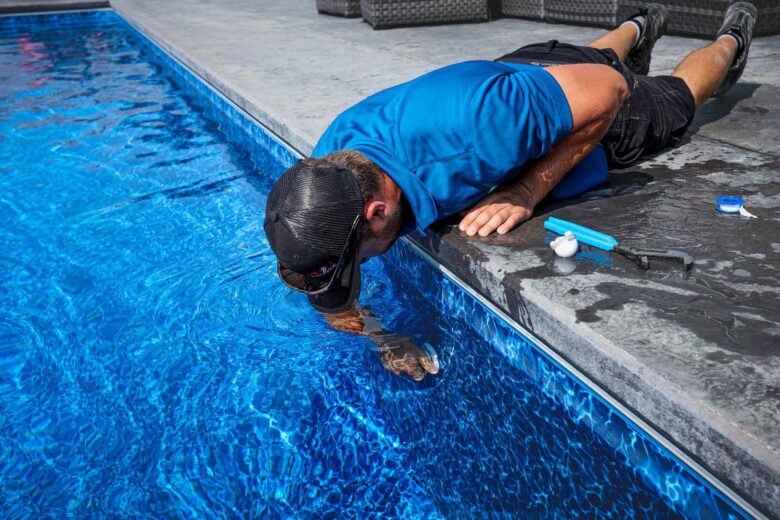
3. Balancing Water Chemistry Before Closing
Water chemistry should never be ignored during pool closing. Balanced water protects surfaces and equipment while discouraging algae growth during dormancy. Adjustments should be made several days before closing to allow proper circulation and stabilization.
Key targets typically include:
- pH adjusted to the lower end of normal
- Total alkalinity balanced to stabilize pH
- Calcium hardness set to protect plaster and liners
- Chlorine raised slightly for sanitation reserve
Avoid shocking immediately before closing. Strong oxidizers dissipate quickly without circulation. Instead, aim for steady, balanced chemistry that holds longer. Well-balanced water is the silent protector of pool finishes during months of inactivity.
4. Lowering the Water Level Safely
Lowering water is essential, but it must be done correctly. The goal is to remove water from areas where freezing causes damage, not to drain excessively.
Water is usually lowered below:
- Skimmer openings
- Return jets
- Water features connected to plumbing
Over-draining can expose liners, cause wall pressure imbalance, or dry out plaster surfaces. Vinyl pools are especially sensitive. Water level decisions should match pool type and cover design.
Many freeze-related liner failures occur because water was lowered too far, not because it was left too high.
5. Draining and Protecting Pool Equipment
Once water is lowered, equipment becomes the priority. Pumps, filters, heaters, chlorinators, and exposed plumbing must be completely drained.
Any trapped water expands when frozen and cracks housings internally, often without visible external signs.
Equipment winterization typically includes:
- Removing drain plugs
- Opening air relief valves
- Disconnecting unions where possible
- Storing plugs in pump baskets
Some owners prefer to remove pumps entirely and store them indoors. Others leave them drained and covered. Both approaches work when done properly. What matters is eliminating trapped water and preventing moisture buildup inside sealed components.
6. Blowing Out and Sealing Plumbing Lines
This step separates professional-quality closings from risky ones. Plumbing lines must be cleared of water using air, then sealed to prevent re-entry. Gravity draining alone is rarely sufficient.
Lines usually include:
- Skimmer lines
- Return lines
- Cleaner lines
- Water feature lines
After blowing out, expansion plugs are installed to seal openings. In colder climates, pool antifreeze is sometimes added for extra protection. This antifreeze is non-toxic and designed specifically for pools, not automotive use.
Most freeze-related pipe failures occur because water remained trapped in horizontal sections that appeared empty. Air pressure ensures complete evacuation.
7. Adding Winterizing Chemicals Strategically
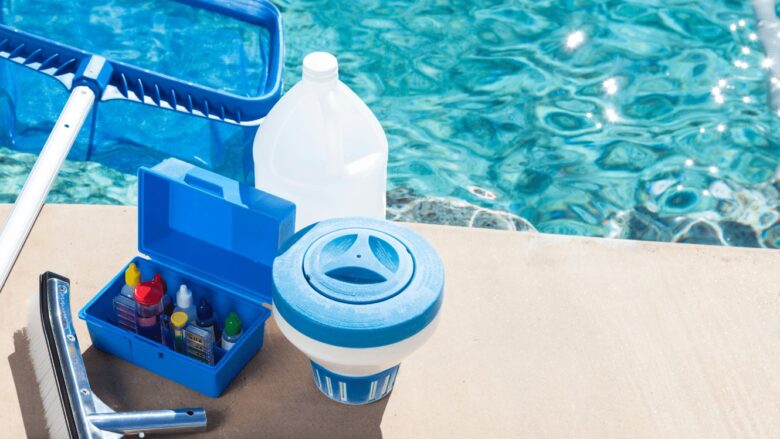
Winter chemicals are not magic solutions. They work best in clean, balanced water and should be added in a specific order. Algaecide, stain preventers, and enzyme treatments each serve a purpose.
A typical approach includes:
- Non-copper algaecide to prevent staining
- Scale and metal control agents
- Enzymes to break down residual organics
Circulate chemicals thoroughly before final shutdown. Never add products after lines are sealed. The goal is long-term stability, not aggressive sanitation. Overdosing creates residue that complicates spring opening rather than helping it.
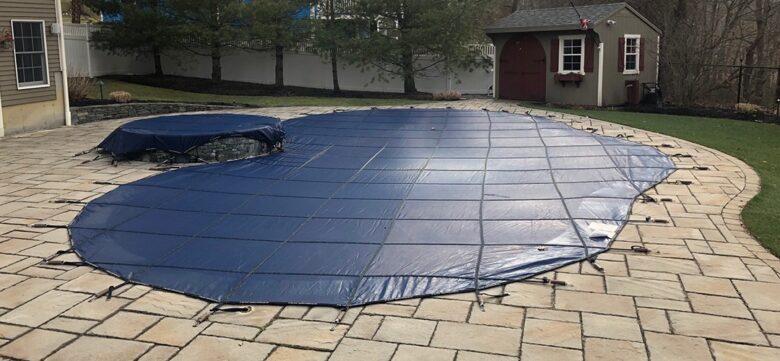
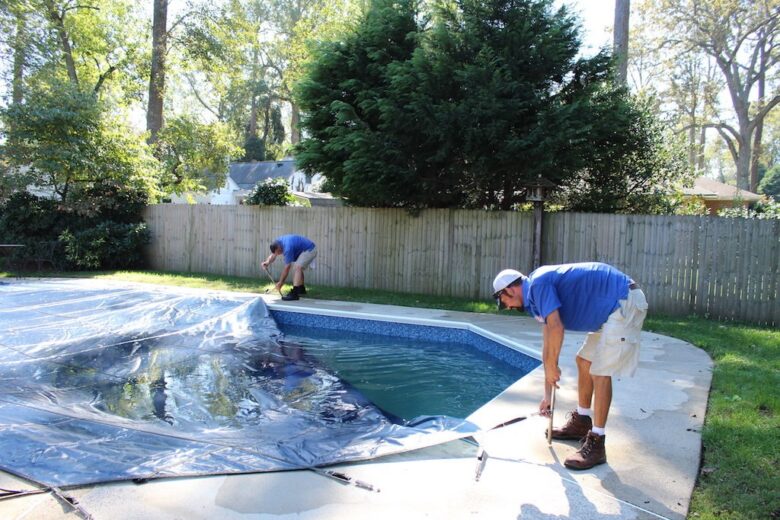
8. Installing and Securing the Pool Cover
The cover is your pool’s primary defense against debris, sunlight, and temperature swings. A poorly installed cover allows water intrusion, debris accumulation, and safety hazards.
Different covers require different approaches:
| Cover Type | Key Focus | Common Mistake |
| Mesh safety cover | Proper tension | Loose anchors |
| Solid safety cover | Pumping water | Allowing sagging |
| Winter tarp | Secure edges | Wind gaps |
After installation, inspect anchor points, straps, and water accumulation areas. Covers should be checked periodically during winter storms. A strong cover prevents contamination and protects water chemistry all season long.
9. Mid-Winter Monitoring and Small Checks
Once closed, a pool is not entirely maintenance-free. Occasional checks prevent small issues from escalating. Heavy snow, ice, or storms can shift covers or damage anchors.
Recommended winter checks include:
- Removing excess water from solid covers
- Checking for cover movement
- Inspecting visible equipment for moisture intrusion
These quick inspections take minutes and can prevent costly repairs. Ignoring the pool entirely until spring increases risk, especially in regions with fluctuating winter temperatures.
10. Common Pool Closing Mistakes to Avoid
Many winter pool problems trace back to avoidable shortcuts. Understanding common mistakes helps reinforce good habits.
Frequent errors include:
- Closing while water is still warm
- Skipping line blowing and relying on gravity
- Using automotive antifreeze
- Leaving water inside equipment
- Ignoring chemistry balance
Each mistake increases risk incrementally. Combined, they often guarantee spring repairs. Pool closing works best as a system, not a checklist of isolated steps.
Final Thoughts
Closing a pool properly is not about doing more work. It is about doing the right work at the right time, with attention to detail. Every step, from timing and cleaning to plumbing protection and cover installation, plays a role in preserving your investment through winter.
When done correctly, pool closing becomes invisible. No cracked pipes. No green water. No spring panic. Just a smooth reopening and a pool that feels like it was cared for, not abandoned.
If there is one takeaway, it is this: winter damage is rarely caused by winter itself. It is almost always caused by how the pool was prepared for it.