
Basement wall cracks are more than just an eyesore; they can be a sign of serious structural issues. Addressing these cracks promptly can prevent further damage and maintain the integrity of your home.
Also, finding professionals is the best solution for this project. Look for well-known companies in your area. The process is actually quite simple, just look for basement repair near me.
This guide will provide you with detailed steps to fix basement wall cracks and ensure your house remains sturdy and safe.
1. Understanding the Types of Basement Wall Cracks

Before you start any repair work, it’s essential to identify the type of crack you are dealing with. Basement wall cracks generally fall into three categories:
- Hairline: These are minor and usually not a cause for immediate concern. They are often the result of the natural settling of the house.
- Diagonal: These cracks may indicate differential settlement, where one part of the house settles more than another. They can also result from pressure exerted by expansive soil.
- Vertical and Horizontal: Vertical cracks are often caused by the foundation settling, while horizontal cracks are more serious and usually indicate hydrostatic pressure from water-saturated soil pushing against the wall.
2. Assessing the Severity
Determining the severity of the cracks is crucial for deciding the appropriate repair method. If the cracks are wider than 1/8 inch or show signs of water leakage, it’s advisable to consult a professional. Smaller cracks can typically be managed with DIY solutions.
3. Preparing for the Repair
Proper preparation is key to a successful repair. Here’s what you need to do:
- Clean the Area: Remove any dirt, dust, and debris from the cracks using a wire brush.
- Dry the Area: Ensure the area is completely dry. Use a heat gun or hair dryer if necessary.
- Safety First: Wear protective gear, including gloves and safety glasses, to protect yourself from dust and debris.
4. Choosing the Right Repair Materials
Depending on the type and severity of the crack, you may need different materials. Common options include:
- Epoxy Injection Kits: Suitable for hairline and small cracks, providing a strong bond.
- Hydraulic Cement: Ideal for stopping active water leaks and can be used on larger cracks.
- Polyurethane Foam: Expands to fill cracks and is effective for both structural and non-structural repairs.
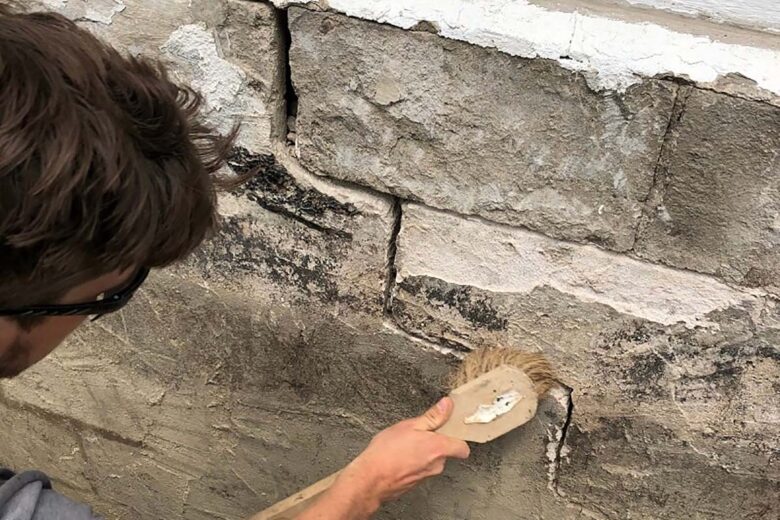
5. Step-by-Step Repair Process
Source: triadbasementwaterproofing.com
Here’s a detailed guide to repairing different types of cracks:
Repairing Hairline Cracks with Epoxy Injection
- Mix the Epoxy: Follow the instructions on the epoxy injection kit to mix the epoxy.
- Inject the Epoxy: Use a caulking gun to inject the epoxy into the crack, starting from the bottom and working your way up.
- Seal the Crack: After filling the crack, use a putty knife to smooth the surface and remove any excess epoxy.
- Cure Time: Allow the epoxy to cure as per the manufacturer’s instructions.
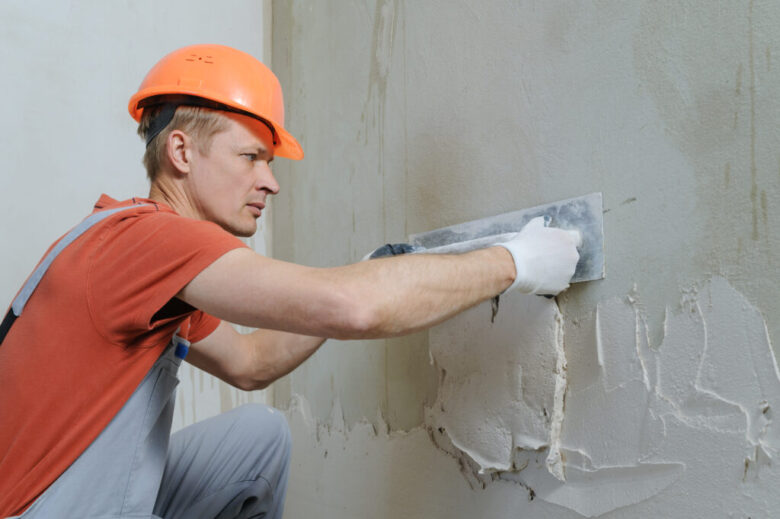
Repairing Larger Cracks with Hydraulic Cement
- Mix the Cement: Follow the instructions on the hydraulic cement packaging.
- Apply the Cement: Use a trowel to press the cement into the crack, ensuring it’s filled completely.
- Smooth the Surface: Smooth the surface with a trowel and remove any excess cement.
- Cure Time: Allow the cement to cure as directed.
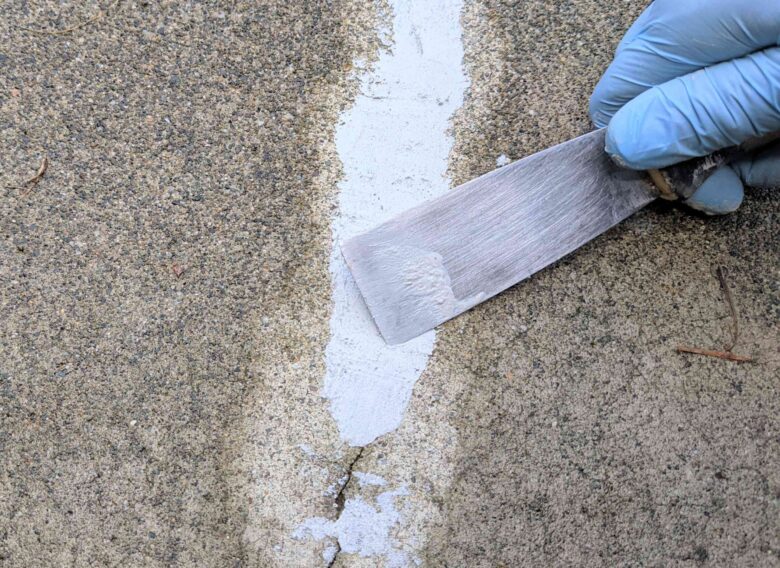
Repairing Structural Cracks with Polyurethane Foam
- Drill Holes: Drill holes along the crack at regular intervals, following the instructions on the polyurethane foam kit.
- Inject the Foam: Insert the foam nozzle into the holes and inject the foam until it begins to ooze out of the crack.
- Seal the Crack: Smooth the foam with a putty knife and remove any excess.
- Cure Time: Allow the foam to expand and cure as per the manufacturer’s instructions.
6. Preventing Future Cracks
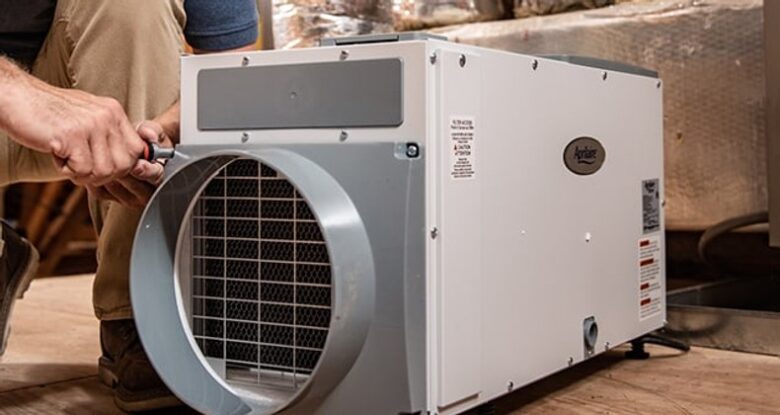
Source: sylvane.com
After repairing the cracks, it’s essential to take steps to prevent future damage:
- Maintain Proper Drainage: Ensure your gutters and downspouts direct water away from your foundation.
- Control Moisture Levels: Use a dehumidifier in your basement to keep humidity levels in check.
- Inspect Regularly: Regularly inspect your basement walls for new cracks or signs of water damage.
7. When to Call a Professional
While many basement wall cracks can be repaired with DIY methods, some situations require professional intervention:
- Significant Structural Damage: If the cracks are extensive or show signs of structural instability, it’s best to consult a structural engineer.
- Persistent Water Leaks: If you cannot stop water leakage despite multiple repair attempts, seek professional help.
- Uncertainty: If you’re unsure about the severity of the cracks or the best repair method, a professional assessment can provide peace of mind.
8. Cost Considerations
The cost of repairing basement wall cracks can vary widely depending on the severity and the repair method used. Here’s a general idea of what to expect:
- DIY Epoxy Injection Kits: $50 to $200
- Hydraulic Cement: $20 to $50 per bag
- Polyurethane Foam Kits: $100 to $300
- Professional Repairs: $500 to $2,500 or more, depending on the extent of the damage
9. Long-Term Maintenance
Source: thespruce.com
To ensure your repairs last, consider these long-term maintenance tips:
- Monitor the Area: Keep an eye on the repaired cracks and surrounding areas for any signs of new damage.
- Maintain Your Foundation: Ensure proper grading around your home to prevent water pooling near the foundation.
- Regular Inspections: Schedule regular inspections with a professional to catch any potential issues early.
Conclusion
Fixing basement wall cracks is essential for maintaining the structural integrity of your home. By understanding the types, assessing their severity, and using the right repair methods, you can effectively address the problem and prevent future damage. Regular maintenance and professional inspections will help ensure your basement remains crack-free and your house stays safe for years to come.
Remember, taking prompt action to repair basement wall cracks can save you time, money, and stress in the long run. So, roll up your sleeves, gather your materials, and get started on making your basement walls as good as new.